Beginner's Guide to Making AI Headshots, Avatars, and Art
Have you ever wanted to see yourself as an astronaut on Mars, a character in a Renaissance painting, or clad in cool cyberpunk armor? With recent AI tools, you can – and you don’t need a computer science degree to do it. This beginner-friendly guide will walk you through training a LoRA model of your own face using Replicate’s Flux LoRA Trainer. We’ll cover what LoRAs are, why Flux training is great, and how you can easily create a custom AI image model with your photos.
With the recent release of Google's Nano Banana and Alibaba Cloud's Qwen Image Edit you may wonder what the point of training a custom model is. Nano Banana, in particular, can produce some amazing results with just one input image. I highly recommend you check it out if you haven't already. Where it will start to fall apart is when you want great character consistency (the picture looks like you) and very different poses/settings. There is still a place for training your own model, and it can be a fun topic to learn more about.
This is a very beginner's guide for anyone with an interest. I actually "vibe coded" a website one night for fun floxy.net to provide services for folks who wanted high-quality outputs but didn't have the hardware or time to do it themselves. I've spent hundreds of hours on the topic, and this is really meant to be just a fun, accessible introduction to it.
What Are LoRAs (and What’s Flux)?
LoRA stands for Low-Rank Adaptation, a technique developed in 2021 to fine-tune large AI models cheaply and efficiently. Instead of modifying all of a model’s parameters (which requires a lot of data), LoRAs add a small set of new weights on top of an existing model, while keeping the original model frozen. Think of it like putting a custom filter on a camera lens – the base model stays the same, but the LoRA “filter” tweaks the outputs in a specific way. This means you can teach the model a new concept (like your face or an art style) without retraining everything from scratch. The result of training is a tiny LoRA file (the “trained weights”) that can be applied to the big model to create a fine-tuned version. In short, a LoRA is a lightweight add-on that captures new features or styles and can be swapped in and out.
Flux, in this context, is the name of an image generation model (from the original creators of Stable Diffusion, the most well-known model) that is used as the base for fine-tuning. The Flux LoRA Trainer is a tool on the website Replicate that fine-tunes the Flux model with LoRAs really fast. How fast? The folks at Replicate and Black Forest Labs optimized the training so that you can go from concept to model in minutes, not hours. That said, there is a quality tradeoff in this approach. It's not what I use to create my images anymore, but it is a great and easy place to start.
Why Train Your Own AI Model (Instead of Using an App)?
You might have seen apps that generate avatar portraits or put you in various scenes. Those are fun, but training your own LoRA model has some big advantages:
- You Own the Model: When you train a LoRA on Replicate, the model (and your photos) are owned by you. You can download it and even run it locally at no cost (that's a subject for another guide).
- Cost Control: With Replicate’s pay-as-you-go system, you only pay for the compute you actually use – no recurring subscription fees. Training usually costs just a few dollars (about $2 for a standard 1000-step training run), and each image generation costs only pennies. There are no credits that expire and no pressure to “use it or lose it.” You can add $10 of credit and it will still be there next month if unused.
- Higher Quality & Flexibility: The Flux model is a full-powered image generator, so your results can be high-resolution and detailed. You’re not limited to preset styles – you can prompt anything you imagine. Want to be a medieval knight, a film noir detective, or a Pixar-style cartoon? Go for it! You have the freedom to experiment with different prompts, styles, resolutions, and more fine-grained settings like "inference steps," which often yield better and more diverse results.
- Expirimentation: Once you have a replicate account (another great service is fal.ai), you have an easy way to access almost every major model in existence - the state of the art in image, video, and sound generation. Replicate handles the API calls to these services and charges you the same usage fee as if you set up your own account and built your own API calls to all of them. It's really fun to try out all the different models, compare their strengths, and always have an easy way to access the latest and greatest without creating multiple accounts.
Overall, training your own LoRA model gives you control, privacy, and quality. Replicate’s interface makes it super approachable. Let’s dive into the step-by-step process, from preparing your photos to seeing the final AI-generated images of yourself!
Step 1: Collect Your Photos for Training
The first thing you need is a set of photos of you (or whoever the subject is) to teach the AI what you look like. Follow these tips to prepare a great training dataset:
- Gather ~20 clear photos of yourself. Aim for a variety of shots: some close-ups of your face, some upper body or half-body shots. This gives the model enough examples to learn a consistent concept of you. More is generally better, but you can get good results with ~10–15 quality photos.
- Vary your backgrounds and attire. Don’t use twenty identical selfies from the same day. Instead, include photos with different backgrounds (indoors, outdoors, different rooms) and wear different shirts or outfits in a few of them. The variety helps the model understand you as the constant, rather than memorizing one background or outfit.
- Keep the subject solo. It’s important that only you appear in these training photos. Avoid group photos or anyone else’s face in frame. The training will try to learn one subject – if multiple people are present, it can confuse the AI about who the “target” is. So crop out others or stick to solo shots.
- Good lighting and quality. Use photos where your face is clearly visible (not blurry or in heavy shadows). You don’t need professional pictures – phone photos work great – just make sure your face isn’t obscured. Neutral expressions or slight smiles are fine; you can include a couple with different expressions so the model doesn’t learn only one look. 1024 pixels is all you need for training flux models (more isn't any better).
- No need for captions. You might see guidance in some AI training about providing text captions for each image. For flux, this has no positive impact on training; ignore them and make your life easier.
Once you’ve gathered your photos, put them in a folder and zip that folder (most training interfaces expect a single .zip file upload). Make sure the zip contains just image files (common formats like .jpg or .png). Now you’re ready to "bake the cake" – setting up the training job on Replicate.
Step 2: Set Up the Flux LoRA Training on Replicate
Head over to Replicate’s Flux LoRA Trainer page: replicate.com/replicate/fast-flux-trainer/train. You'll need to create an account.
Once you’re on the training page, you’ll see a form to configure your training run. Let’s go through the key settings:
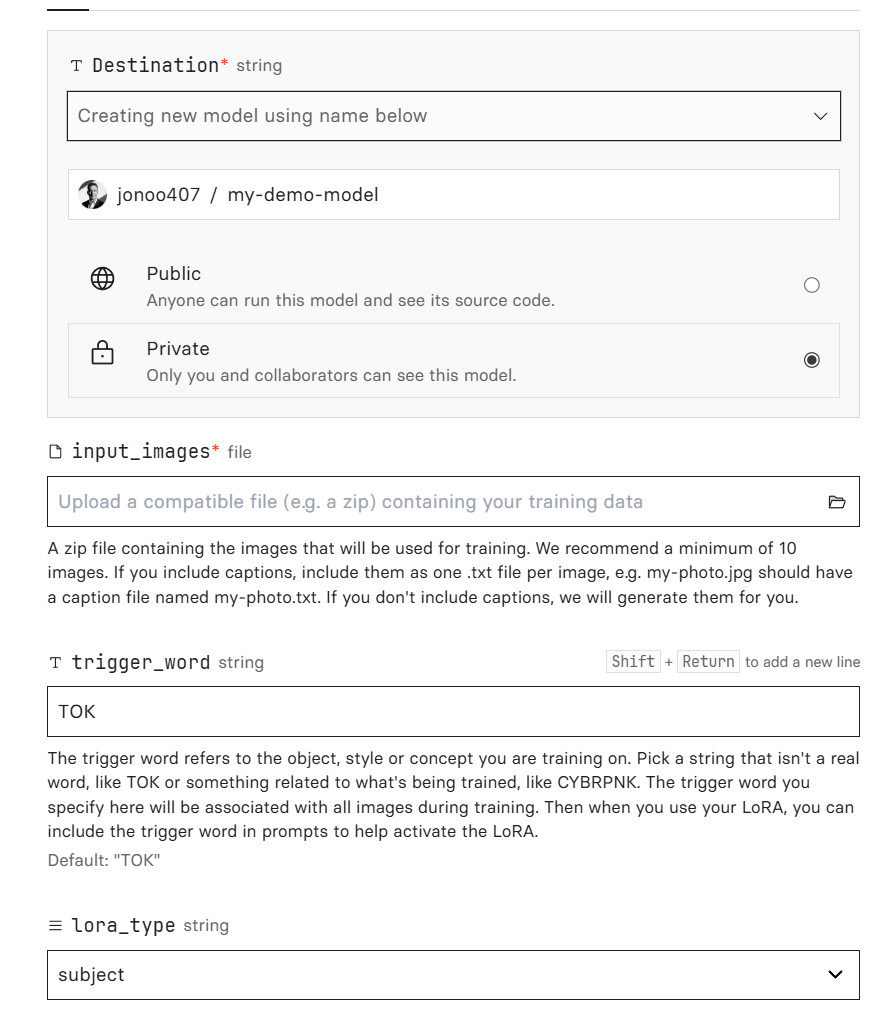
- Destination (Model Name): This is like naming your model and deciding where it will live on your account. Click the dropdown and select Private, since you likely don’t want your personal face model to be public. Then, in the text field, type a name for your model, like “
yourusername/your-model-name”. - Upload the ZIP of images: You should see an Input field for
input_images. Upload the.zipfile containing your 10–20 photos. - Trigger Word: This is a unique code word the model will learn to associate with you. Essentially, during training the system will tag your images with this made-up word, and later you’ll use the same word in prompts to trigger the model to insert “you” into imagesreplicate.com. Choose a word that is not a common word. Many people use a mashup of their name or something random. For instance, if your name is Alice, you might pick Alice427. Write down or remember this trigger word! You’ll need to use it in your prompts later.
- Training Type (Subject vs Style): Select Subject for this tutorial.
- Steps: This determines how long the training runs (how many iterations). A good rule of thumb is to start with 1500 steps. When you get more advanced, you can start playing with the steps to dial things in. Like baking a cake, you can use too many steps (burn the cake) or too few (gooey cake). There are actually a lot of variables that go into this, and if you are interested, you can Google”flux lora training” and go down a rabbit hole. Replicate hides most of these settings from you, but you can adjust the steps (e.g., if the likeness doesn’t match yours, try increasing them to 2000 or 2500).
When the training starts, you’ll be redirected to a training status page. You can watch the logs or just take a break. The process will go through 1500 steps and will take a while. Thanks to the Flux trainer using powerful GPUs in parallel, it’s really fast – often on the order of 5–10 minutes (much faster than older methods that could take hours).
Step 3: Monitor and Access Your Trained Model
Replicate will notify you (and/or show on the page) once the training is complete. If you navigated away, you can find the training under your account’s Trainings section to check the status. Once finished, the LoRA has been saved to the destination model we specified.
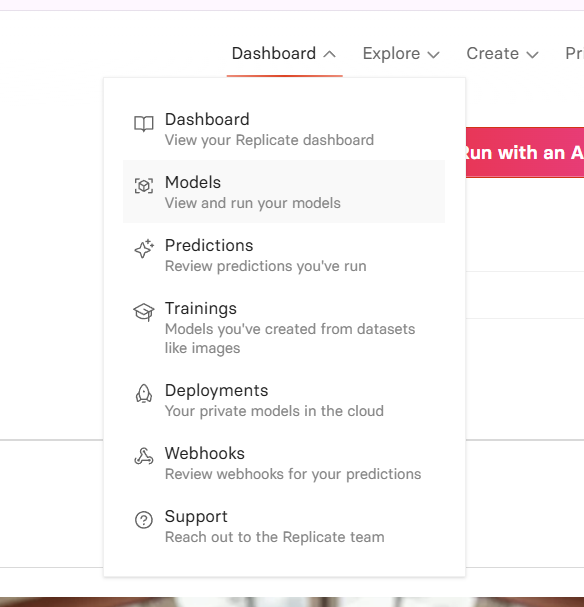
So, where do you actually find and use your new model? In your Replicate account dashboard, click on “Models”. Your model should be listed there (with the name you gave it).
On the model’s page, you’ll see details like the model name (in format yourusername/modelname) and a big “Run” or “Predict” interface where you can input a prompt. This is where the magic happens next.
Tip: If you ever need to re-train or train another LoRA, you can reuse the same model name (it will create a new version), or create separate models for different subjects. For example, you could train one LoRA for yourself, another for a friend (in their own private model), or even one for your dog. Your account can have multiple models. Just be mindful of naming and keeping track of trigger words for each.
AI, fitness, business—practical wins, not hype. If you made it this far you might enjoy my free weekly newsletter [Add me (one email/week)].
Step 4: Generate Images with Your New Model
Now for the fun part – using your freshly trained model to create AI images of yourself in all sorts of scenarios! On your model’s page, you should see a prompt input field. It’s time to write a prompt that includes your trigger word.
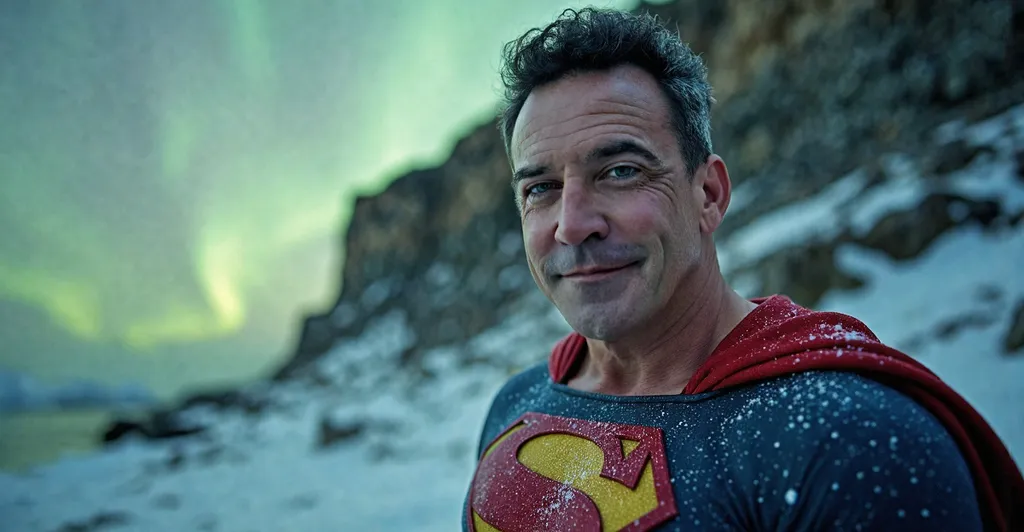
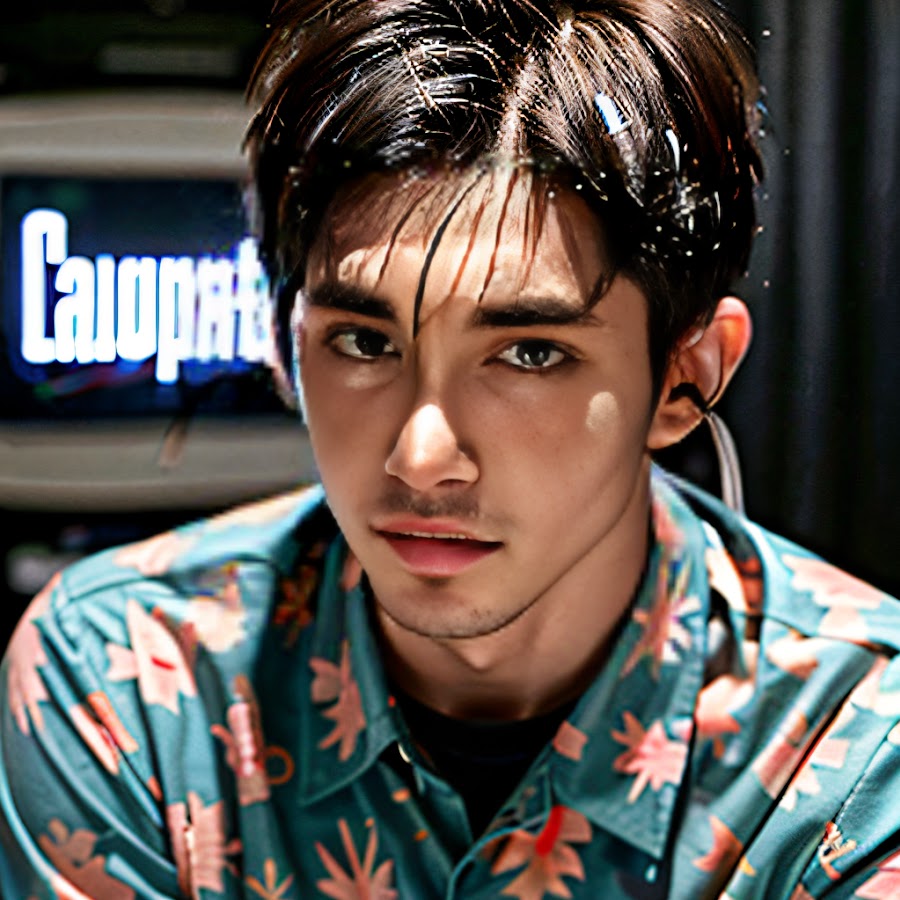
Using the trained model to generate images on Replicate. In the prompt field, you’ll describe the scene or style you want, and include the trigger word you chose earlier. For example, if your trigger word is “Alice427”, a prompt could be: “A fantasy painting of Alice427 as a warrior queen, cinematic lighting, highly detailed.” By including Alice427 in the prompt, you’re telling the model “put me (the trained subject) into this scene.” The model then generates an image with your likeness in that context.
Go ahead and try an initial prompt. For starters, you could do something simple like “photo of <trigger_word> woman in a professional headshot style” to see a plain result of your face. The generation will take several seconds to produce an image. You should then see the output right on the page.
Now you can get creative with prompts. Describe any scene, attire, or art style you want to see yourself in. Here are some fun prompt ideas to test out:
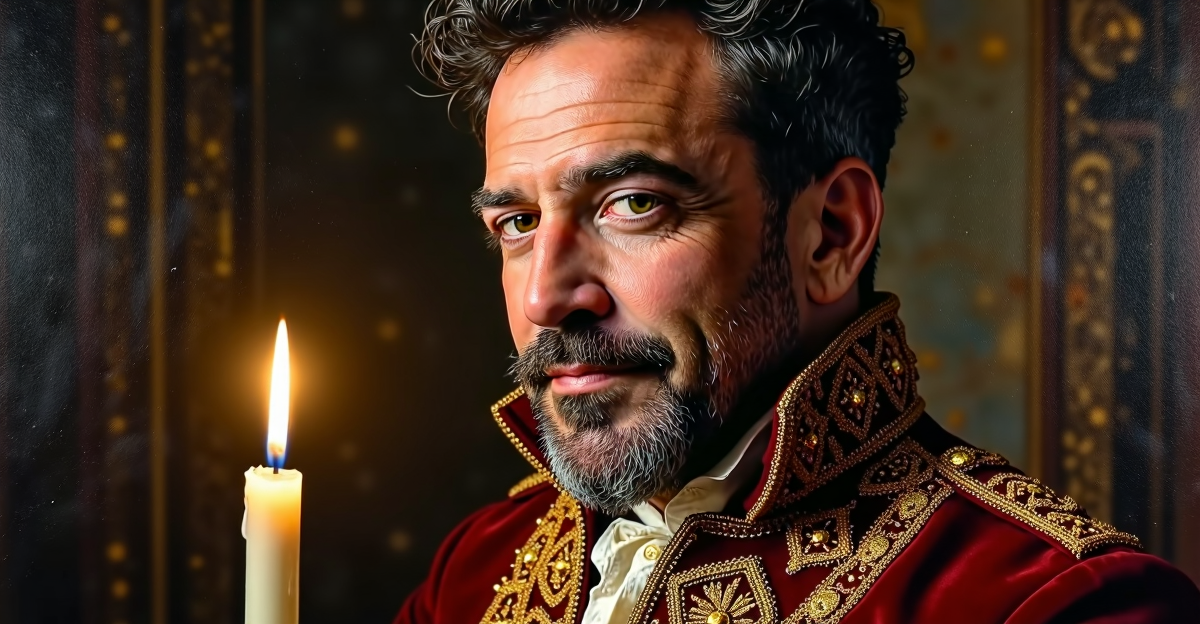
- Historical Portrait: “Oil painting of <trigger_word> man as a Renaissance era royal, in the style of Rembrandt.” This can produce a classic-looking painted portrait of you from the 15th century.
- Desert Explorer: “<trigger_word> man, half-body, cinematic portrait shows a desert explorer in golden-hour light—sand-dusted cowl, armored straps, and a cyan-lensed scanner in hand—rendered with crisp micro-detail and shallow depth of field. Behind him, a ruined multi-arched temple rises through heat-haze, the warm amber grade and soft bokeh

- Cartoon Style: “Pixar-style cartoon of <trigger_word> man as a pirate” or maybe “anime style portrait of <trigger_word>”. You can have the model render you in different artistic styles (cartoon, anime, painting, 3D render, etc.).

Feel free to experiment and mix ideas. You might be surprised at how versatile the outputs can be. For even more inspiration or to refine your prompts, check out prompt resources like Promptomania (great for crafting prompts with modifiers) and Lexica (a gallery of AI-generated images and the prompts that created them). On Lexica, you can search for keywords (e.g., “astronaut” or “renaissance portrait”) to see example images and copy portions of those prompts into your own. Promptomania offers templates and tips for stable diffusion prompts if you want to get the lighting, style, and composition just right. Finally, the most well-known site is civit.ai, it's a great place to look at images for inspiration and creators often include the model used, settings and prompt. You can even generate images on the site but they use mostly quantized versions (lower quality) of open-source models. The link above is for the "green" (work-appropriate) civit.ai site.
As you generate images, you can tweak your prompts to improve results. For example, adding terms like “highly detailed, 4k, intricate lighting” can enhance realism or detail. If an image isn’t quite right, try changing some words or adding a style reference (e.g. “in the style of Monet” for an impressionist painting vibe). Part of the fun is experimenting – you’ll quickly learn what kinds of prompts produce the best images of you.
Finally, keep in mind you can also adjust some settings on the generation page (depending on the interface) – such as the output resolution or guidance scale. The default settings are usually fine to start with. You might generate a few variations of each prompt to pick the best. Since each run costs only a few cents, you have plenty of freedom to play around without breaking the bank.
Next Steps and Conclusion
Congratulations on training your first Flux LoRA model and generating some awesome images! By now, you’ve taken your own photos, trained a custom AI model, and created unique artwork starring you. That’s a huge level-up in your AI creativity journey. So, what’s next?
- Try more ideas: Now that you have a personal model, keep exploring different prompts and styles. Maybe do a series of images like “<trigger_word> travels the world” with you composited into famous places, or “<trigger_word> as different movie characters.” The possibilities are endless.
- Train other LoRAs: You can fine-tune other models for new subjects. For example, train a LoRA of your pet, a cosplayer, or even a particular art style you like. Flux LoRA Trainer isn’t just for faces – it can learn any subject or style depending on what images you provide. (Just remember to use a new unique trigger word for each). You could also experiment with training on a different base model or adjusting advanced settings once you get the hang of it.
- Advanced training: If you want to take things to the next level drop me a comment or send me a message to encourage me to write part 2. Warning: you can easily spend hundreds of hours in the world of AI image, video, and audio generation. Also check out these resources (linking youtube videos but these creators have other content too):

Most importantly, have fun and keep creating. You now have your own AI image generator persona at your fingertips. It’s like having an infinitely imaginative mirror that can place you into any scene or artwork you dream up.
Call to Action: I’d love to see what you create with your custom LoRA model. If you follow this guide and make some cool images, please share them! You can reach out to me in the comments, on social media, or via the contact info on my site – show off your favorite AI self-portraits or ask any questions you have.
AI, fitness, business—practical wins, not hype. Read by founders, PMs, and consultants who want usable AI. [Add me (one email/week)]

